Image Quality Analysis
This guide walks you through testing your capture signal quality to ensure optimal OCR performance.
Why Test Image Quality?
Poor image quality causes failed card detection, incorrect stack readings, unstable detection rectangles, and overall unreliable OCR. The quality test checks resolution match, pixel accuracy, compression artifacts, and color fidelity.
Testing with a reference image helps reduce OCR errors which will cause wrong Advices to be shown.
Step 1: Download Test Image
Step 2: Open Image on Poker PC
Important: Use Paint, NOT Windows Photo Viewer
Windows Photo Viewer and other image viewers scale the image which destroys quality. You must use Paint or similar software that displays the image at 100% size.
- Right-click the downloaded test image
- Select Open with → Paint, or click the image below on Poker PC to view fullscreen:

- Make sure the image is displayed at 100% zoom (View → Zoom → 100%)
Correct
- Open with **Paint** - 100% zoom - No scaling appliedWrong
- Windows Photo Viewer - Any zoom other than 100% - "Fit to window" enabledStep 3: Render and Analyze
- On your OCR PC, open RenderColorQC
- Click Render to see the Poker PC screen
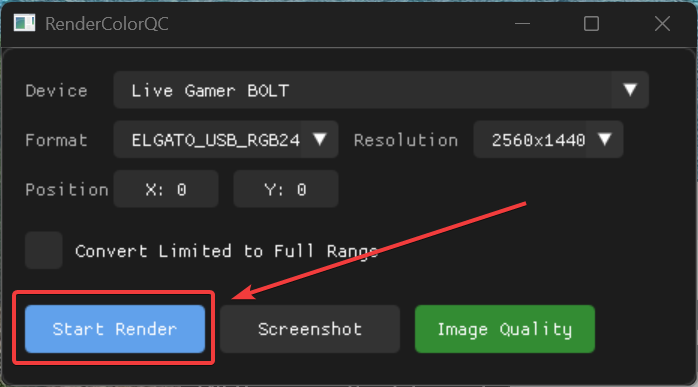
- Verify the test image is visible
- Click Image Quality to analyze the signal
- The result should be over 98%
- Check the generated
pixel_magnified.png- it should look clear and sharp like this reference:
![]()
Quality Results
| Quality | Status | Action |
|---|---|---|
| 99-100% | Excellent (Green) | Ready to use |
| 95-98% | Good (Yellow) | Acceptable, minor issues possible |
| Below 95% | Poor (Red) | Check cables, resolution settings, and capture card |
Troubleshooting Poor Quality
If your quality is below 95%:
- Check resolution settings - Both PCs must match (see Capture Setup)
- Check scaling - Both PCs must be at 100% scaling
- Check cables - Use only HDMI-to-HDMI cables (no adapters or converters):
- Poker PC → Splitter IN
- OUT1 → Monitor
- OUT2 → Capture Card
- DisplayPort-to-HDMI, USB-C-to-HDMI, or other adapters will cause quality problems
- Try different HDMI cables if issues persist
- Check capture card - Only use supported capture cards from our list. Cheap or unsupported capture cards have poor quality
- Check splitter - Are the EDID buttons set to "EDID copy OUT1"?
Next Step
Once image quality is confirmed, proceed to Table Detection.